
Solar MeshCore Repeater With Ikoka Nano and Cavity Filter
This is the build Austin Mesh has installed on top of the University of Texas at Austin’s Physics, Math, and Astronomy building as of September 2025.
Parts List
- SMA Male to N-Female 240 — 20” coax
- 4” IPX to SMA Male
- 1/2” Cable Gland (for coax)
- PG9 Cable Gland (for solar)
- VENT-PS1YBK-N8001 drain plug or via Mouser
- 5.8dBi N-Male Omni antenna
- Voltaic Systems 10W solar panel
- BK103 solar panel bracket
- Female 3.5x1.1mm to USB-C adapter
- Voltaic Systems V25 battery or direct from Voltaic Systems
- IP67 11.2”x7.7”x5.1” enclosure (metal latches)
- Right angle USB-C cable
- Acasom 915 MHz cavity filter
- Ikoka Nano
Surrounded by 2200w of public service radio
The installation location is surrounded by 2.2kw of RF radiation from the Austin GATRRS radio system. This means we need extra filtering to avoid overload on the low power LoRa radio that we’re using to run MeshCore.
We’re currently using the Acasom Cavity Filter to accomplish this task. It has been performing successfully for 9 months as of the writing of this post. Historically, we’ve also used the Airframes filter with success. The Airframes has a much small bandpass, and so requires tuning when switching from Meshtastic(908mhz) to MeshCore(910mhz). As a result, when Austin Mesh switched to MeshCore, we simply swapped the existing box for a new prebuilt box and what we had available was the Acasom.
While tuning the Airframes isn’t trivial, it also isn’t particularly difficult. You can read our guide for tuning the Airframes cavity filter here.
Keep cables short
As you can see in the photo of the inside of the box, keeping cables short is a priority when you have a lot of RF noise. This box is by no means fully optimized or perfect, but it’s better than many we see floating around the web!
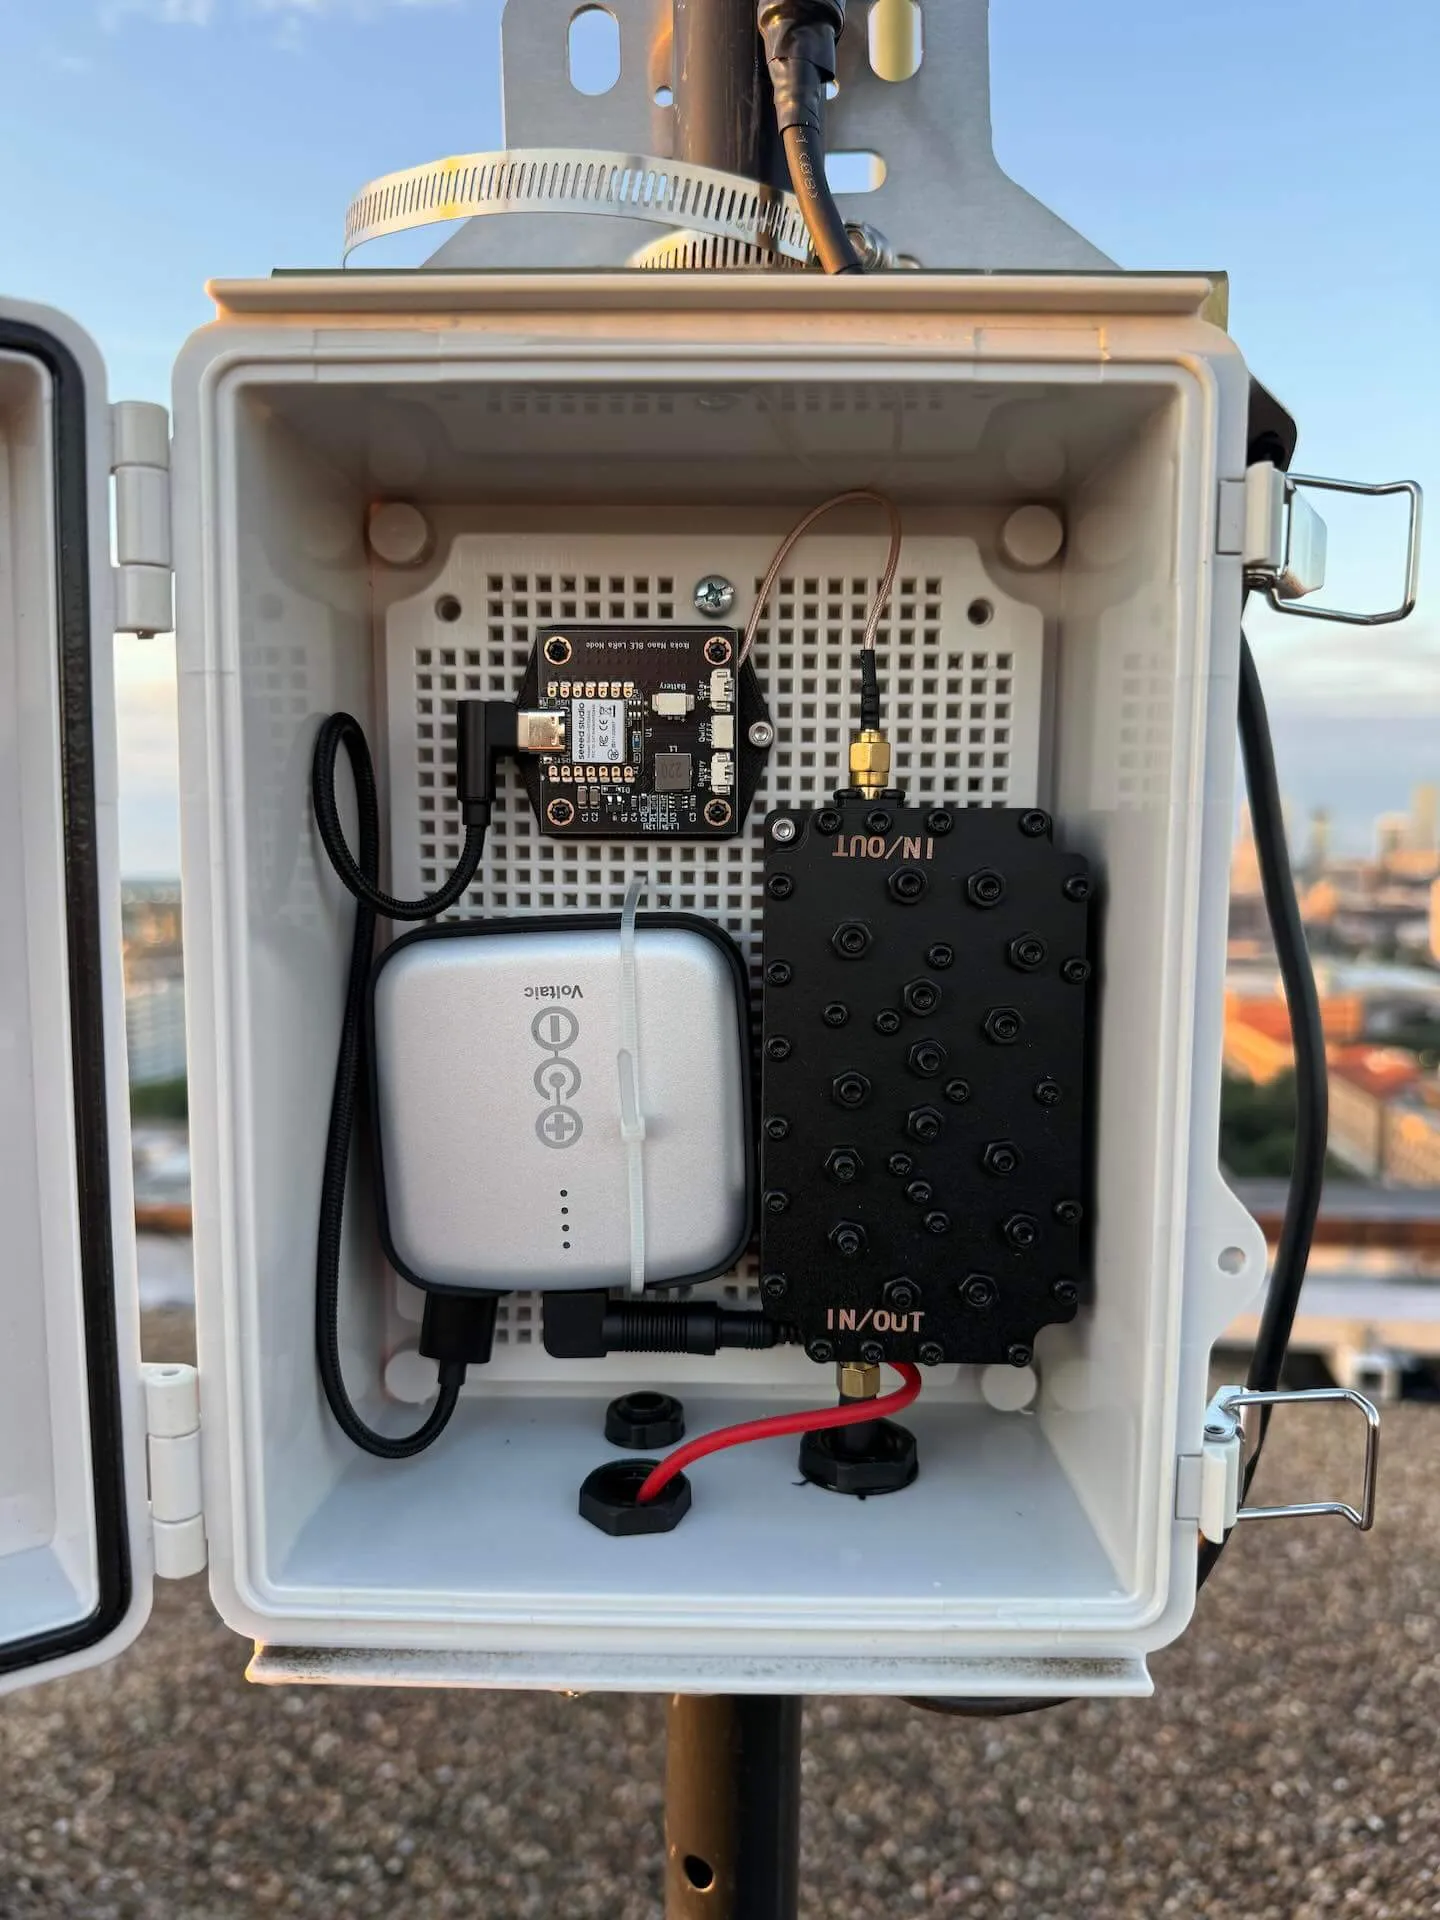
Reduce connectors
To maintain as much power as possible, and to reduce any entry for external RF, we want to reduce the number of adapters. The chain is Ikoka Ipex -> Acasom SMA -> Antenna N-Type. Rather than using a bulkhead N-Type, we simply pass a SMA->N Type cable through a cable gland, direct to the Acasom filter, cutting out at least one adapter and fitting.
Power Source
As you may have seen from our now commonly referenced Solar Parts List we stick to Voltaic Systems batteries. On this install, we’re using the V25, mated to the 10w Voltaic Systems solar panel. The primary downside of this approach is that you won’t be able to see your battery level remotely. However, based on math you’d be able to run for more than a week with ZERO solar. In Austin, that’s just not a reality.
Testing
Always test before installing in less accessible locations! We took a bit of risk with this one, only letting it run for 2 weeks before installing, but it proved successful.
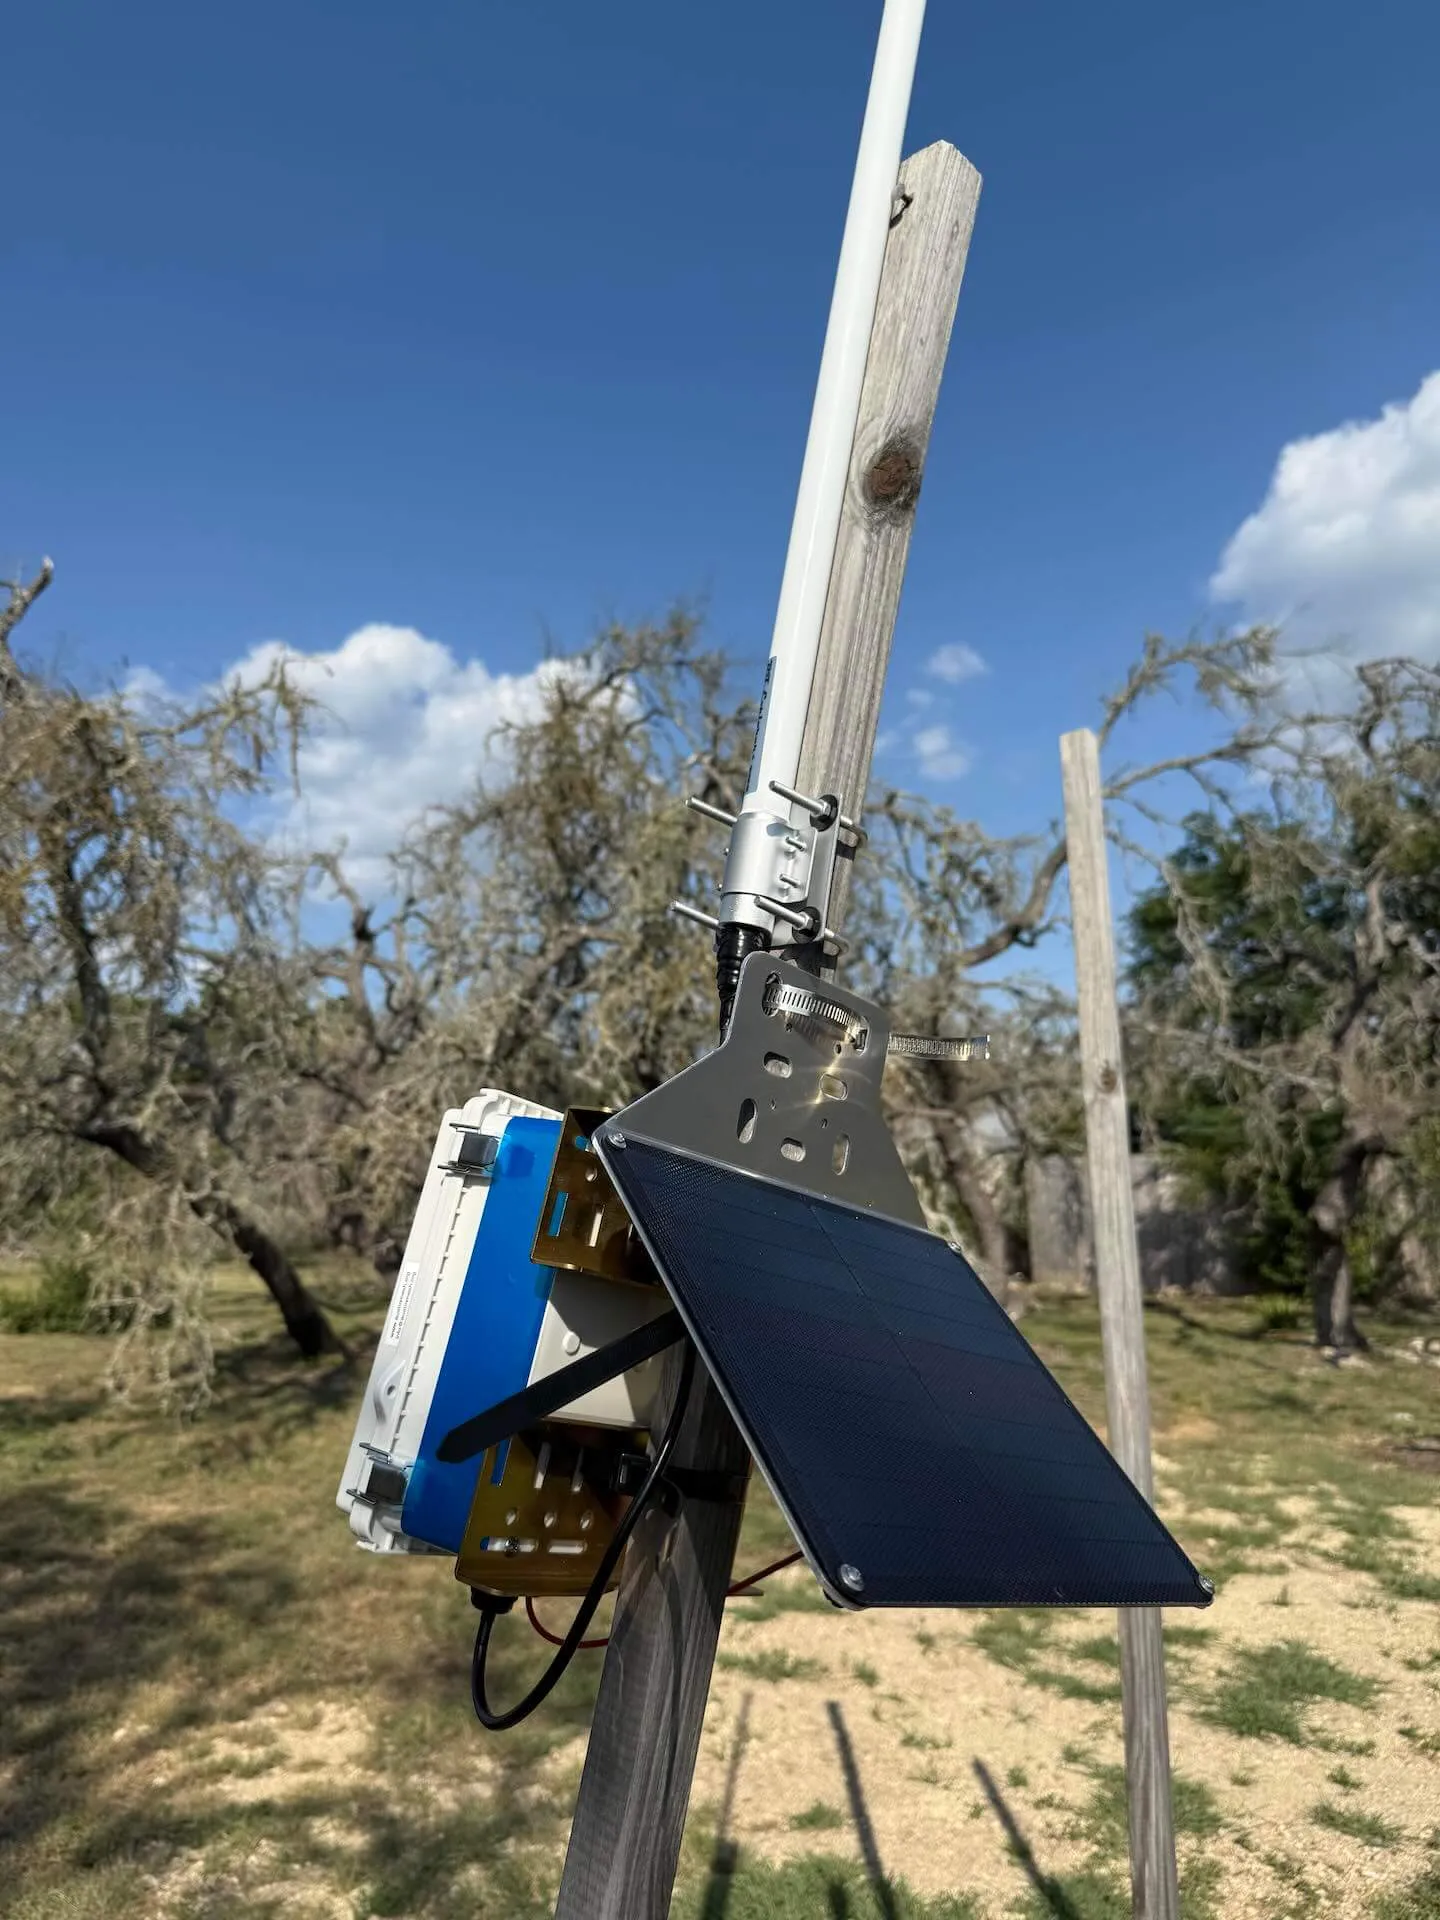
Heat Mitigation
Did you know it gets hot in Texas? Yes, believe it. Double approach here.
- Solar panel shades the box
- We use ColdRays Reflective Film which uses “Black Magic” (aka multi spectral reflective polymer) to help keep the box below ambient temperatures.
Box Buildout
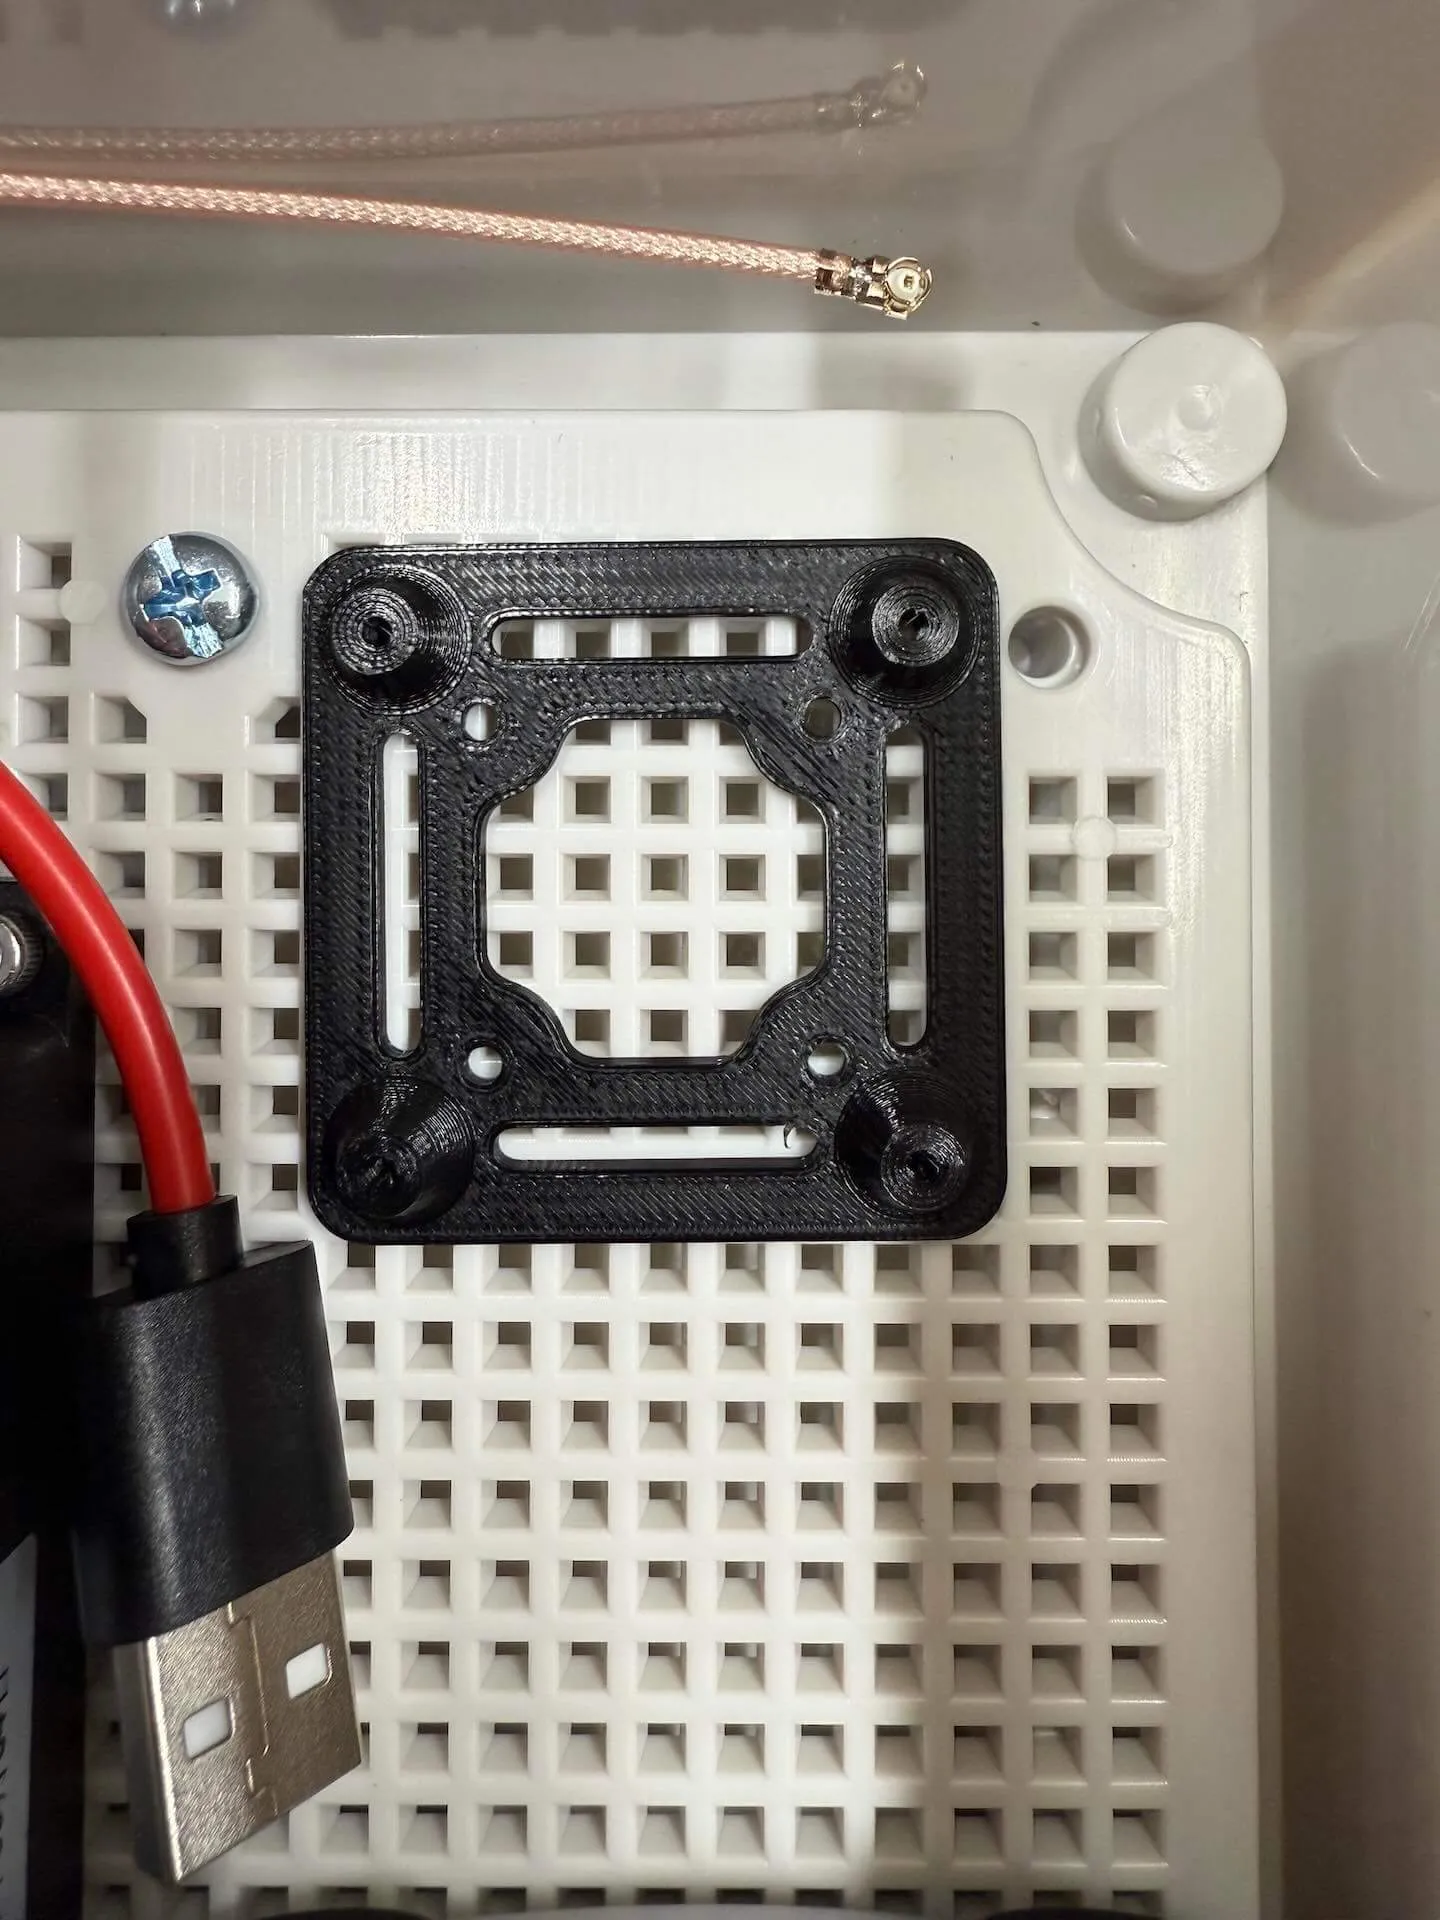
The box is nothing special. The Ikoka required a custom 3d mount (shoutout to Andy Shinn), other than that it’s a simple layout. The v25 using zip ties is certainly the least “professional” thing about this box, but we’ve had boxes running zip tied v25’s installed for over 2 years now, they still run great!